Jamming With Jamboard: Shareable Online Whiteboards
Over the past insane week, almost every teacher has been building online curriculum. While getting your Learning Management System up and running is the most important part of online education, as we hit the next few weeks, being able to navigate other technologies that can help students to engage in both synchronous or asynchronous learning. One of the best tools for this kind of learning is Google’s Jamboard. Released a few years ago as the companion app to Google’s physical Jamboards, the online app is an interactive, shareable whiteboard. What that means for teachers is that a teacher can share this via an online video conference and explain ideas and create connections, teachers can share and collaborate with students, and teachers can give students a copy of a premade Jamboard as an assignment. It is a powerful tool for making deep connections between concepts, to show work, and engage their creative sides through digital art.
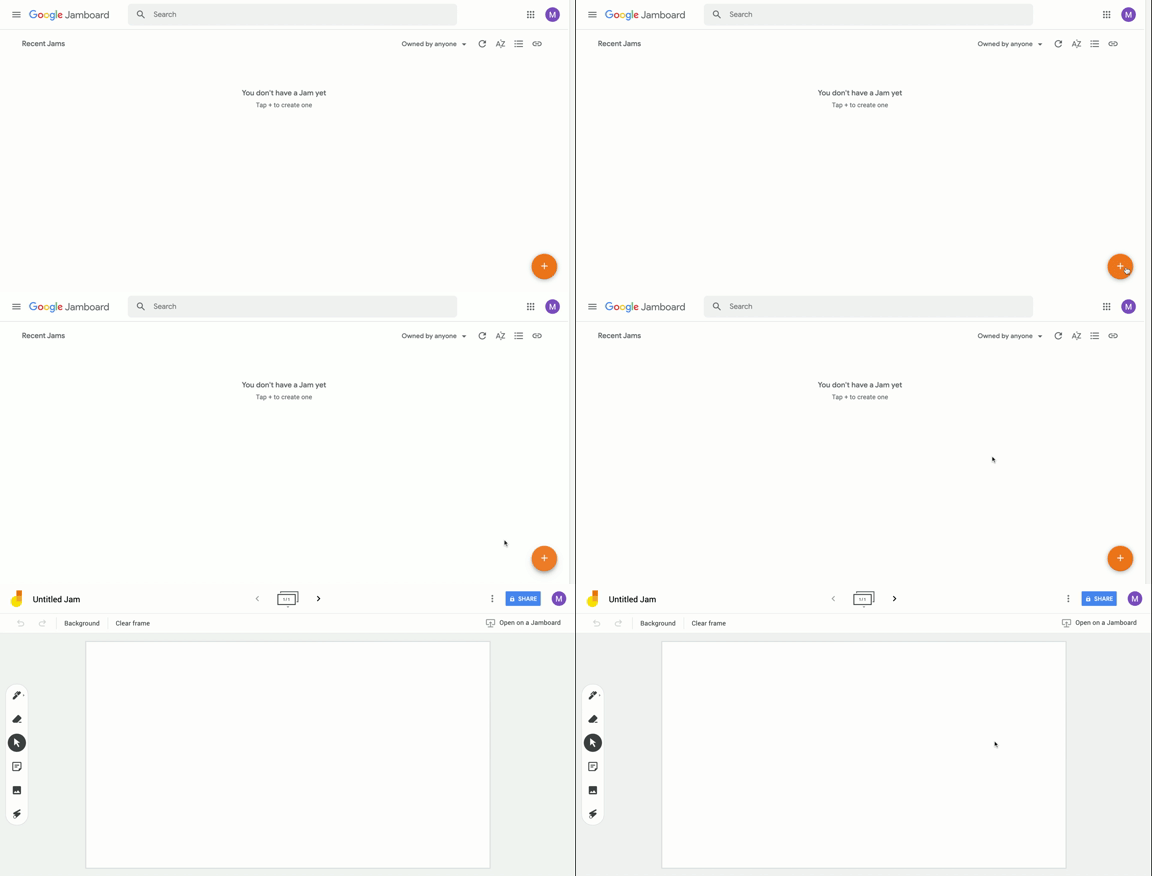
To start, check out the gif above. It walks you through how to make a Jamboard and navigating the menus. Once you have a Jamboard, a user can create as many boards as they would like (see gif below). This means that for every math problem, every character, every historical figure, a teacher can have a board dedicated to them. If you forget a step, you can add it back in by click the “+” button between each board or you can move it from the end to where you need it to be.
Jamboard has a variety of backgrounds to suit a bunch of teacher needs. It has lined paper for handwriting and writing instruction. It have dot matrix and graph paper to help math and science teachers explore functions and graphs with students. If you don’t like the white background or it is hard on your eyes, you can change it to a handful of colors. Just remember that clearing a frame doesn’t take away the background; you have to go back into the background menu.
As for creating on Jamboard, there are a handful of powerful tools. In the gif below, you can see the pen, eraser, and mouse tools. The pen has four options for drawing: pen, marker, highlighter, and brush. Each one gives users a larger stroke and different levels of precision. One of my favorite uses is to add a passage of writing using the picture tool (more on that below) and use the highlighter to show different lines or passages. Users can also choose from six colors that could help color code relationships on a flow chart, highlight different causes, or different elements of a math problem.
The eraser is a bit finicky but if you need to make a big change on your page, just remember that you have the clear frame tool above.
As for the mouse tool, that becomes very useful when you add pictures or sticky notes (more on that below). Users can move different elements into patterns or in order to show relationships.
The sticky note tool is perhaps my favorite tool in Jamboard. I have terrible handwriting, but I can type really quickly; so a sticky note allows users to create as many notes as they need and in a variety of colors. Once a user has created the note, they can automatically create another one or they can click cancel to return to the Jamboard. Once there users can resize the sticky note and change its location and orientation. This allows users to create quick flow charts or mind maps for a variety of subjects.
As an example, every year when I teach Romeo and Juliet I have students create a Jamboard for the play. Each Jamboard is an Act and they have to have a different picture for each character. Then they show how the act plays out and they add gifs and pictures to show relationships. It is a hard assignment for my students, but what ends up happening is that they are able to see all the events in order and keep track of ideas in a traditionally difficult text.
Finally, you can add pictures to your Jamboard, but that is not all: as you can see below, Jamboard supports gifs. What this allows users to do is add a bit of flair to their boards. For younger students that could be useful for creating mind maps or connection charts; whereas older students might be more engaged if they can add gifs and pictures. When I do my Romeo and Juliet charts with students, they are allowed to use any picture or gif to represent characters. So I have had Harry Potter, Spongebob, and Captain America standing in for Romeo. It is a bit weird, but if students know that Harry is Romeo and they are consistent throughout the chart, then why not.
Users can add pictures or gifs from Google Image Search, Google Drive, their Photos, or by upload. Just like sticky notes, photos can be resized and their orientations can be changed as well.
Finally, the last tool on Jamboard is a laser pointer. This allows users while presenting to point out specific information. This could be incredibly powerful if a teacher is using this to present during a Google Hangout and they want students to understand a specific relationship or concept on the chart.
In my classroom, I have found dozens of user for Jamboard for notetaking, creation, and engagement. When paired with Google Classroom or Assignments.Google.com, teachers can make a pre-made Jamboard and make a copy for every student so that they can use the jamboard for a variety of uses.
During this period of teaching, using Jamboard for distance education can infuse a bit of creativity and extra engagement for student whether as an assignment or during an online video conference or posted video. Give it a try! If you need help, as always I am available at matt@teacherwinters.net or on Twitter at @TeacherWinters.


